How to Plan & Execute a Successful VMware vSphere 7 Upgrade
VMware vSphere 7 Upgrade Guide
With the end of VMware’s extended general support for vSphere 6.5, and the end of general support for vSphere 6.7, swiftly approaching (October 15th 2022), many of our clients who have not yet upgraded their VMware estates are now looking to migrate their environment and embark on a vSphere 7 upgrade. This blog, and the accompanying downloadable ebook is a useful guide for vSphere administrators looking for additional information to help plan and execute the upgrade process.
Top Reasons to Upgrade to vSphere 7
- Kubernetes Support and Integration
- vSphere 7 now allows you to use Kubernetes containers in a cluster with load balancing and HA, allowing you to take advantages of modern applications and workloads which use this technology within your VMware environment.
- New DRS Features
- DRS (Distributed Resource Scheduler) have now been updated to be less about “balancing the workload between ESX hosts” and more about “looking after the individual VMs”. This change of approach to look after the resources for each VM and focus on them rather than the ESX hosts means you may not see the usual equal balance across your hosts and it’s more about making sure the resources aren’t in contention on the VMs.
- Tighten physical infrastructure security
- MFA – vSphere 7 now properly supports multifactor Authentication, although beware, integration with different providers can be tricky, for example getting it working with MFA on Azure AD isn’t simple. We’ve found some tricks and tips to getting MFA done and overall it’s a good security improvement for an increasingly targeted attack vector.
- vTA – vSphere Trust Authority – encryption within vSphere has been around (in the enterprise editions) for a while, vTA uses a new Management Cluster separate from other clusters to serve as the root of the trust, distributing keys for the KMS.
- New Guest OS Support
- Windows Server 2019, Ubuntu 19, SUSE Linux 11.x, RHEL 8.x, CentOS 8.x and others are now officially supported.
- Simplify software patching and hardware upgrades
- VMware Lifecycle Manager replaces VMware Update Manager to help with installing patches, upgrades and updates.
- vMotion Updates
- vMotion has been updated to reduce stun time and various memory pre-copy optimisations allow you to migrate large VM workloads (e.g. Oracle databases) more smoothly with almost no performance degradation during live migrations.
Other Points to Note
- Licensing is now “per CPU socket”, although only up to 32 cores per socket, more than 32 cores and you need to apply a second “socket license” to the same socket to cover another 32 cores.
- You’ll need to go to Enterprise Plus licensing to get the full feature set, some of the features such as encryption, distributed virtual switches, host profiles and GPU support aren’t in the basic versions, we’re happy to help advise on the best license options for your requirements.
- Kubernetes support is a further add-on and licensed separately as part of the VMware Cloud Foundation.
- Support for management using built in VNC server has been removed from vSphere 7 so you’ll need to deploy to guests directly or use another method for managing your VMs if this was your method of choice previously.
What more do you need to know before embarking on a vSphere 7 upgrade?
We’ve listed some key points below to help you.
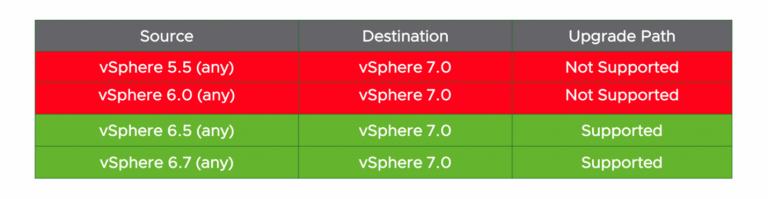
vSphere 7 Upgrade Path
Below are the direct supported upgrade paths to vSphere 7, if you are still running vSphere 6.0 or below, you will need to upgrade your vSphere infrastructure to 6.5 in the first instance, and then you can do a direct vSphere 7 upgrade.
Before You Begin your vSphere 7 Upgrade
- vSphere 7.0 requires one CPU license for up to 32 physical cores. If a CPU has more than 32 cores, additional CPU licenses are required, as announced in “Update to VMware’s per-CPU Pricing Model“.
- Prior to upgrading ESXi hosts, you can determine the number of licenses required using the license counting tool described in “Counting CPU licenses needed under new VMware licensing policy“.
How to Upgrade to vSphere 7
Step 1: Discovery and Assessment
Luckily VMware has a vSphere Assessment Tool to assist in your vSphere upgrade. The vSphere Assessment Tool identifies older unsupported vSphere versions and accelerates your upgrade by providing best practices tips and upgrade documentation to help ensure a successful upgrade. This tool will help give you visibility into your storage and server infrastructure and can provide details on vSphere versions and hardware compatibility to ensure you have all the information you need on your environments. You can gain access to the vSphere Assessment tool by logging into your VMware account via the VMware portal.
Step 2: Do you need to upgrade your current hardware?
ESXi 7.0 requires at least a dual-core CPU, 4 GB RAM, and 8 GB storage for USB / SD boot devices or 32 GB for HDD / SSD / NVMe boot devices.
The vCenter Server 7.0 appliance requires the following compute specifications which represents a slight increase in RAM, and this includes vSphere Lifecycle Manager running as a service on the appliance:
- Tiny (up to 10 hosts, 100 VMs) – 2 CPUs, 12 GB RAM
- Small (up to 100 hosts, 1000 VMs) – 4 CPUs, 19 GB RAM
- Medium (up to 400 hosts, 4000 VMs) – 8 CPUs, 28 GB RAM
- Large (up to 1000 hosts, 10,000 VMs) – 16 CPUs, 37 GB RAM
- X-Large (up to 2000 hosts, 35,000 VMs) – 24 CPUs, 56 GB RAM
Storage resources for the smallest environment start at 415 GB and increase based on database requirements.
The following processor generations are no longer supported in vSphere 7:
- Intel Family 6, Model = 2C (Westmere-EP)
- Intel Family 6, Model = 2F (Westmere-EX)
You can check if your current hardware is compatible with vSphere 7 by using the below VMware Compatibility Guide.
Step 3: Validate Product Compatibility
To confirm your current vSphere products and plugin are supported in the vSphere 7, you can use this handy tool provided by VMware: Interoperability Matrix.
Step 4: Perform the vSphere upgrade
Once you have confirmed your hardware and plugins are compatible with vSphere 7, you can now start the upgrade:
- Backup your current configuration
- Upgrade vCenter Server
- Upgrade ESXi hosts – To ensure sufficient disk storage for log files, consider setting up a syslog server for remote logging. Setting up logging on a remote host is especially important for hosts with a limited amount of local storage.
- Upgrade your VMs manually or by using vSphere Lifecycle Manager to perform an orchestrated upgrade.
Step 5: Validate your Upgrade
You can verify the success of your vCenter Server upgrade or migration. You must be logged into the upgraded or migrated vCenter Server instance. If you created a reference of required information based or a CLI template, you can use it to validate the upgrade or migration success.
Check the following configuration to confirm the upgrade was successful:
- Verify that the IP address is correct.
- Verify that the Active Directory registration has not changed.
- Verify the Network registration is correct.
- Verify the Domain is correct.
- Verify the certificates are valid.
- Verify the inventory data is correctly migrated.
- Review the event’s history.
- Review the performance charts.
- Review the users, permissions, and roles.
If the post-upgrade or post-migration configuration conforms to your required information or CLI template reference and expectations, the vCenter Server upgrade or migration is complete.
If you need to roll back for any reason, please review the Roll Back Doc from VMware.
Important Information
- No Windows vCenter Server from vSphere 7 onwards: There is no Windows vCenter server starting from vSphere 7.
- No External PSC from vSphere 7 onwards: In the past, you could keep vCenter server, and External PSC separated from each other. From vSphere 7 onwards, there is no support for the external PSC. The External PSCs are now a thing of the past.
Download VMware vSphere Upgrade E-Book
This is an eBook resource guide to help VMware customers with all stages of Upgrading to VMware vSphere 7.0, please click on the banner below to download your copy.
If you require assistance with your vSphere upgrade to 7, Krome’s accredited and experienced VMware consultants can support you with the initial planning, the upgrade, validation guidance and rollback procedures, please contact us on 01932 232345.
Download our PDF Brochure
Download a full overview of our services and the benefits of working with Krome.
Want to know more?
Contact us today to explore how our tailored solutions can align with your business priorities.
Related Insight & Resources

Krome Achieves Microsoft Support Services Partner Designation
Krome has achieved the Microsoft Support Services Designation following a rigorous audit process.
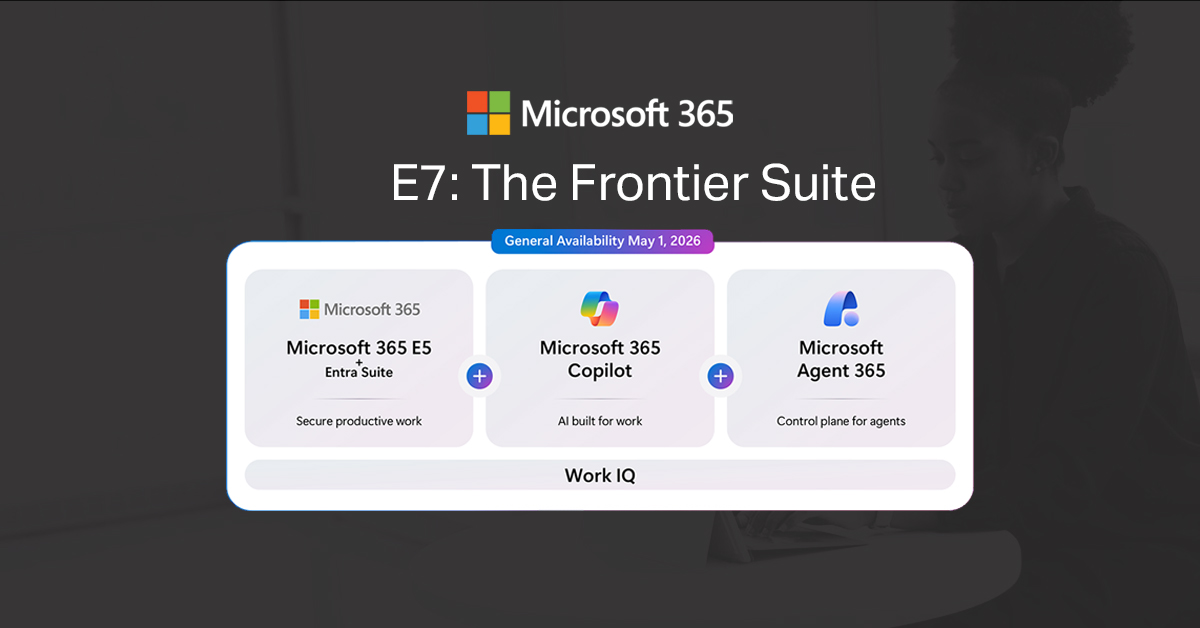
Microsoft E7 vs E5: What’s Changed – And Does Your Organisation Need It?
Microsoft provides security capabilities within M365, but they do not automatically protect you.
Microsoft 365 Security in 2026: Identity, Configuration and Recoverability
Microsoft provides security capabilities within M365, but they do not automatically protect you.